This feature is an enterprise feature. If you want to enable it, please contact your account manager.
- You need to add aditional variables to the placement that are not available in your DataLayer or CMS (e.g. custom promotional phrases for specific products)
- You want to display offers for particular SKUs or product categories that can’t be easily identified through standard DataLayer or CMS parameters.
Defining a target
Each target is defined by an “identifier”. The first step is for you to decide what identifier you want to use. In most cases, this will be a SKU.
Then, you need to create the placement you want to run your offer. Remember that you make your messaging more engaging by adding dynamic text using variables.
Finally, add all the targets you want to run your offer on.
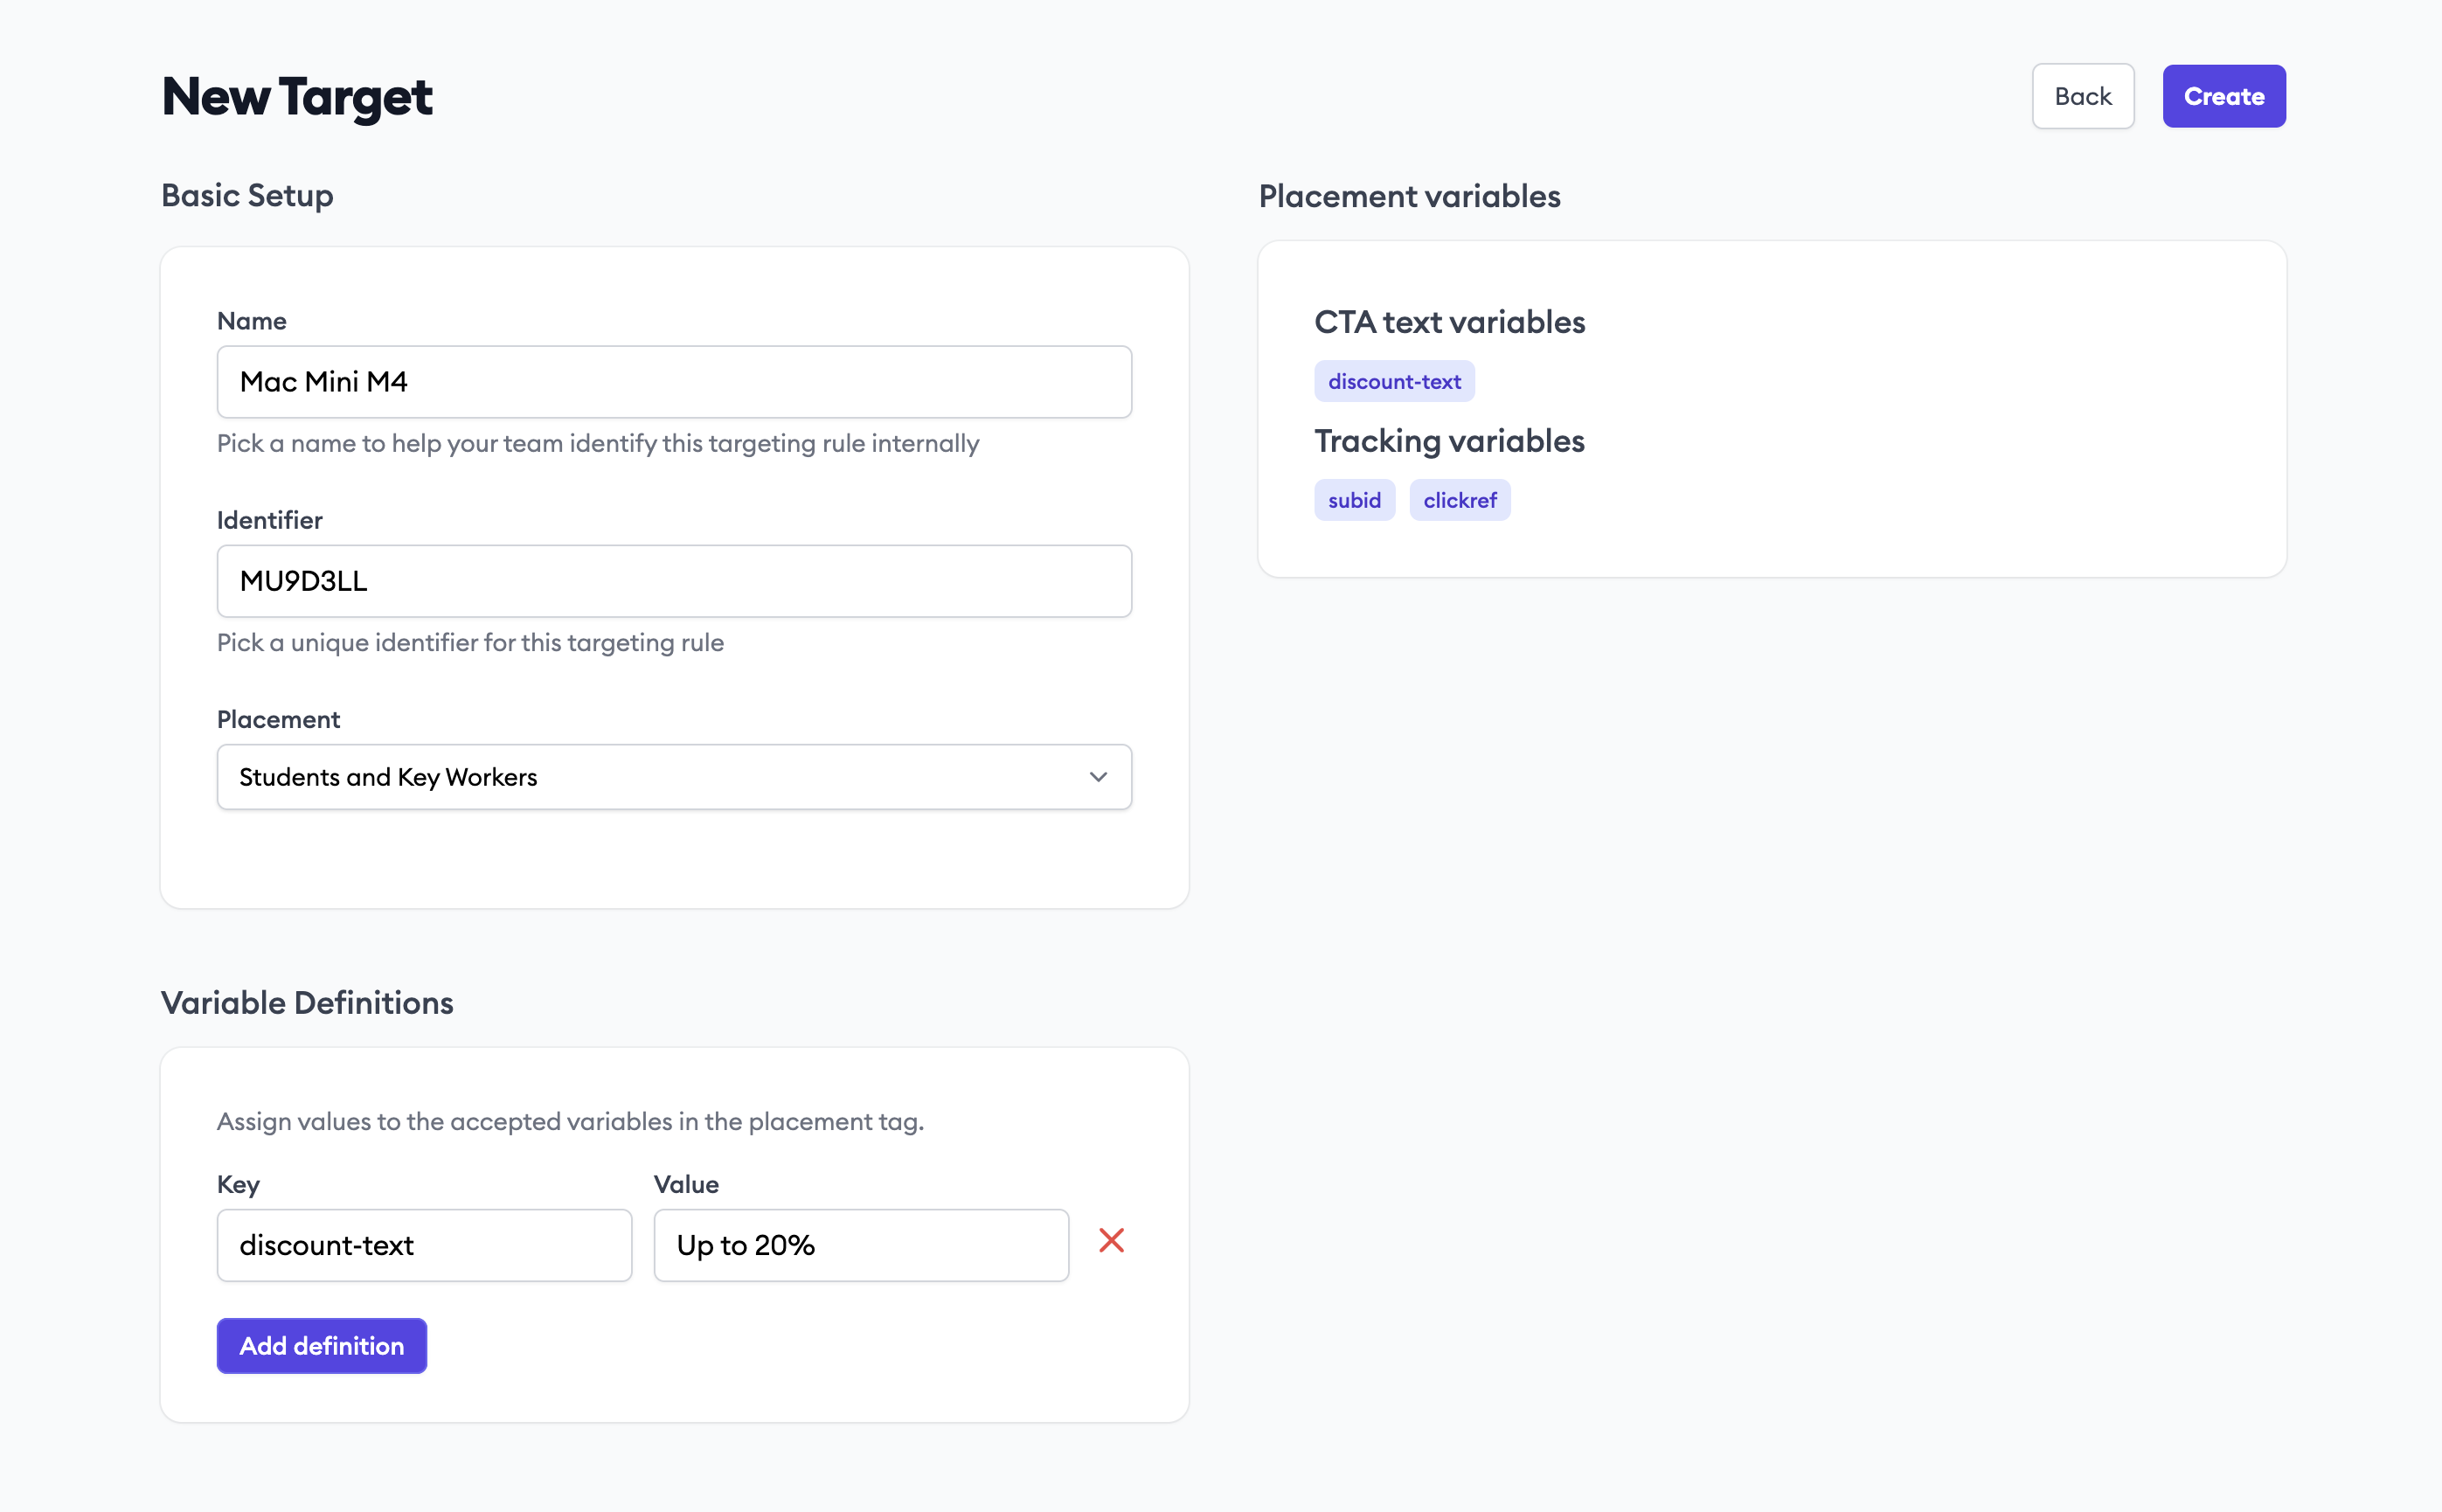 Once you select the placement you want to use, all the variables included in its CTA will be displayed in the “Placement variables” section. You will be able to feed all the value for these variables in the “Variable definitions” section.
You can also load multiple targets from a CSV file, by selecting the “Multiple targets” option.
Once you select the placement you want to use, all the variables included in its CTA will be displayed in the “Placement variables” section. You will be able to feed all the value for these variables in the “Variable definitions” section.
You can also load multiple targets from a CSV file, by selecting the “Multiple targets” option.
Importing targets from CSV
When uploading multiple targets via CSV, the form displays the required column format:
 Your CSV file should contain the following columns:
- identifier (required) - The target identifier (e.g., SKU)
- placement_token (required) - The placement to associate with the target
- name (optional) - A human-readable name for the target
- Any additional columns will be added as variable definitions for your placement
You can choose to update existing records or create new ones. The “Update existing records and create new records” option is non-destructive and will preserve any targets not included in your CSV.
Searching targets
Use the search field to find existing targets by name or identifier. The search uses full-text matching with prefix support, so you can:
- Search by partial terms: typing “pro” will match targets containing “professional” or “product”
- Use multiple search terms: typing “Plus Silver” will match targets where both terms appear, such as “BAR Plus USB Flash Drive 512 GB Silver”
- Search across fields: queries match against both the target identifier and name
Multi-term search is useful when you have many similar targets. For example, searching “Buds graphite” will find “Galaxy Buds FE / graphite / BT” even though those terms aren’t adjacent in the target name.
Triggering the placement
Once targets are configured in the platform, you need to trigger them on your website. There are two methods available:
Using the web component (Recommended)
The simplest way to display a target is to add the <gocertify-target> web component directly in your HTML where you want the placement to appear:
The identifier attribute should match the identifier you configured for the target (e.g., a SKU). The component automatically fetches the placement content and renders it inline.
The web component approach is recommended because it requires less custom code and handles page readiness automatically for more reliable loading.
Using JavaScript
If you need more control over when the target loads, you can use the JavaScript function. This is useful when the identifier needs to be dynamically retrieved from the page (e.g., from a hidden HTML element or DataLayer):
The cssAnchor parameter is optional. Use it to specify where the placement should appear if it’s not already defined in the placement configuration.