> ## Documentation Index
> Fetch the complete documentation index at: https://docs.gocertify.me/llms.txt
> Use this file to discover all available pages before exploring further.
# Add Landing Pages
> Convert shoppers with targeted, gated rewards.
Landing pages are a powerful tool for converting key communities and boosting your SEO. To get the most out of the Gocertify experience we recommend you:
* **Create a landing page** for each of your high value campaigns (i.e. 20% off for Students)
* **Create multi-offers page** to showcase all your discounts in one place.
## Create Campaign landing pages
While your brand is in draft mode, you will see all available verification groups with a preview banner in the top right. Once live only your selected groups will be visible.
Best practice is to create dedicated landing pages for your high-priority communities, like Key Workers and Students.
To increase SEO traffic ensure that the group name and “discount” is mentioned.
* **Clear Page Slug:** i.e `student`, `key-worker`, `senior`, `youth`, `disability`
* **Meta title and H1:** *company* student discount
* **Meta description:** We know that a little help goes a long way when you're a student. Verify your student status and you can get 10% off.
* **Relevant Copy:** \~300 words talking about the campaign and why it's important to your audience.
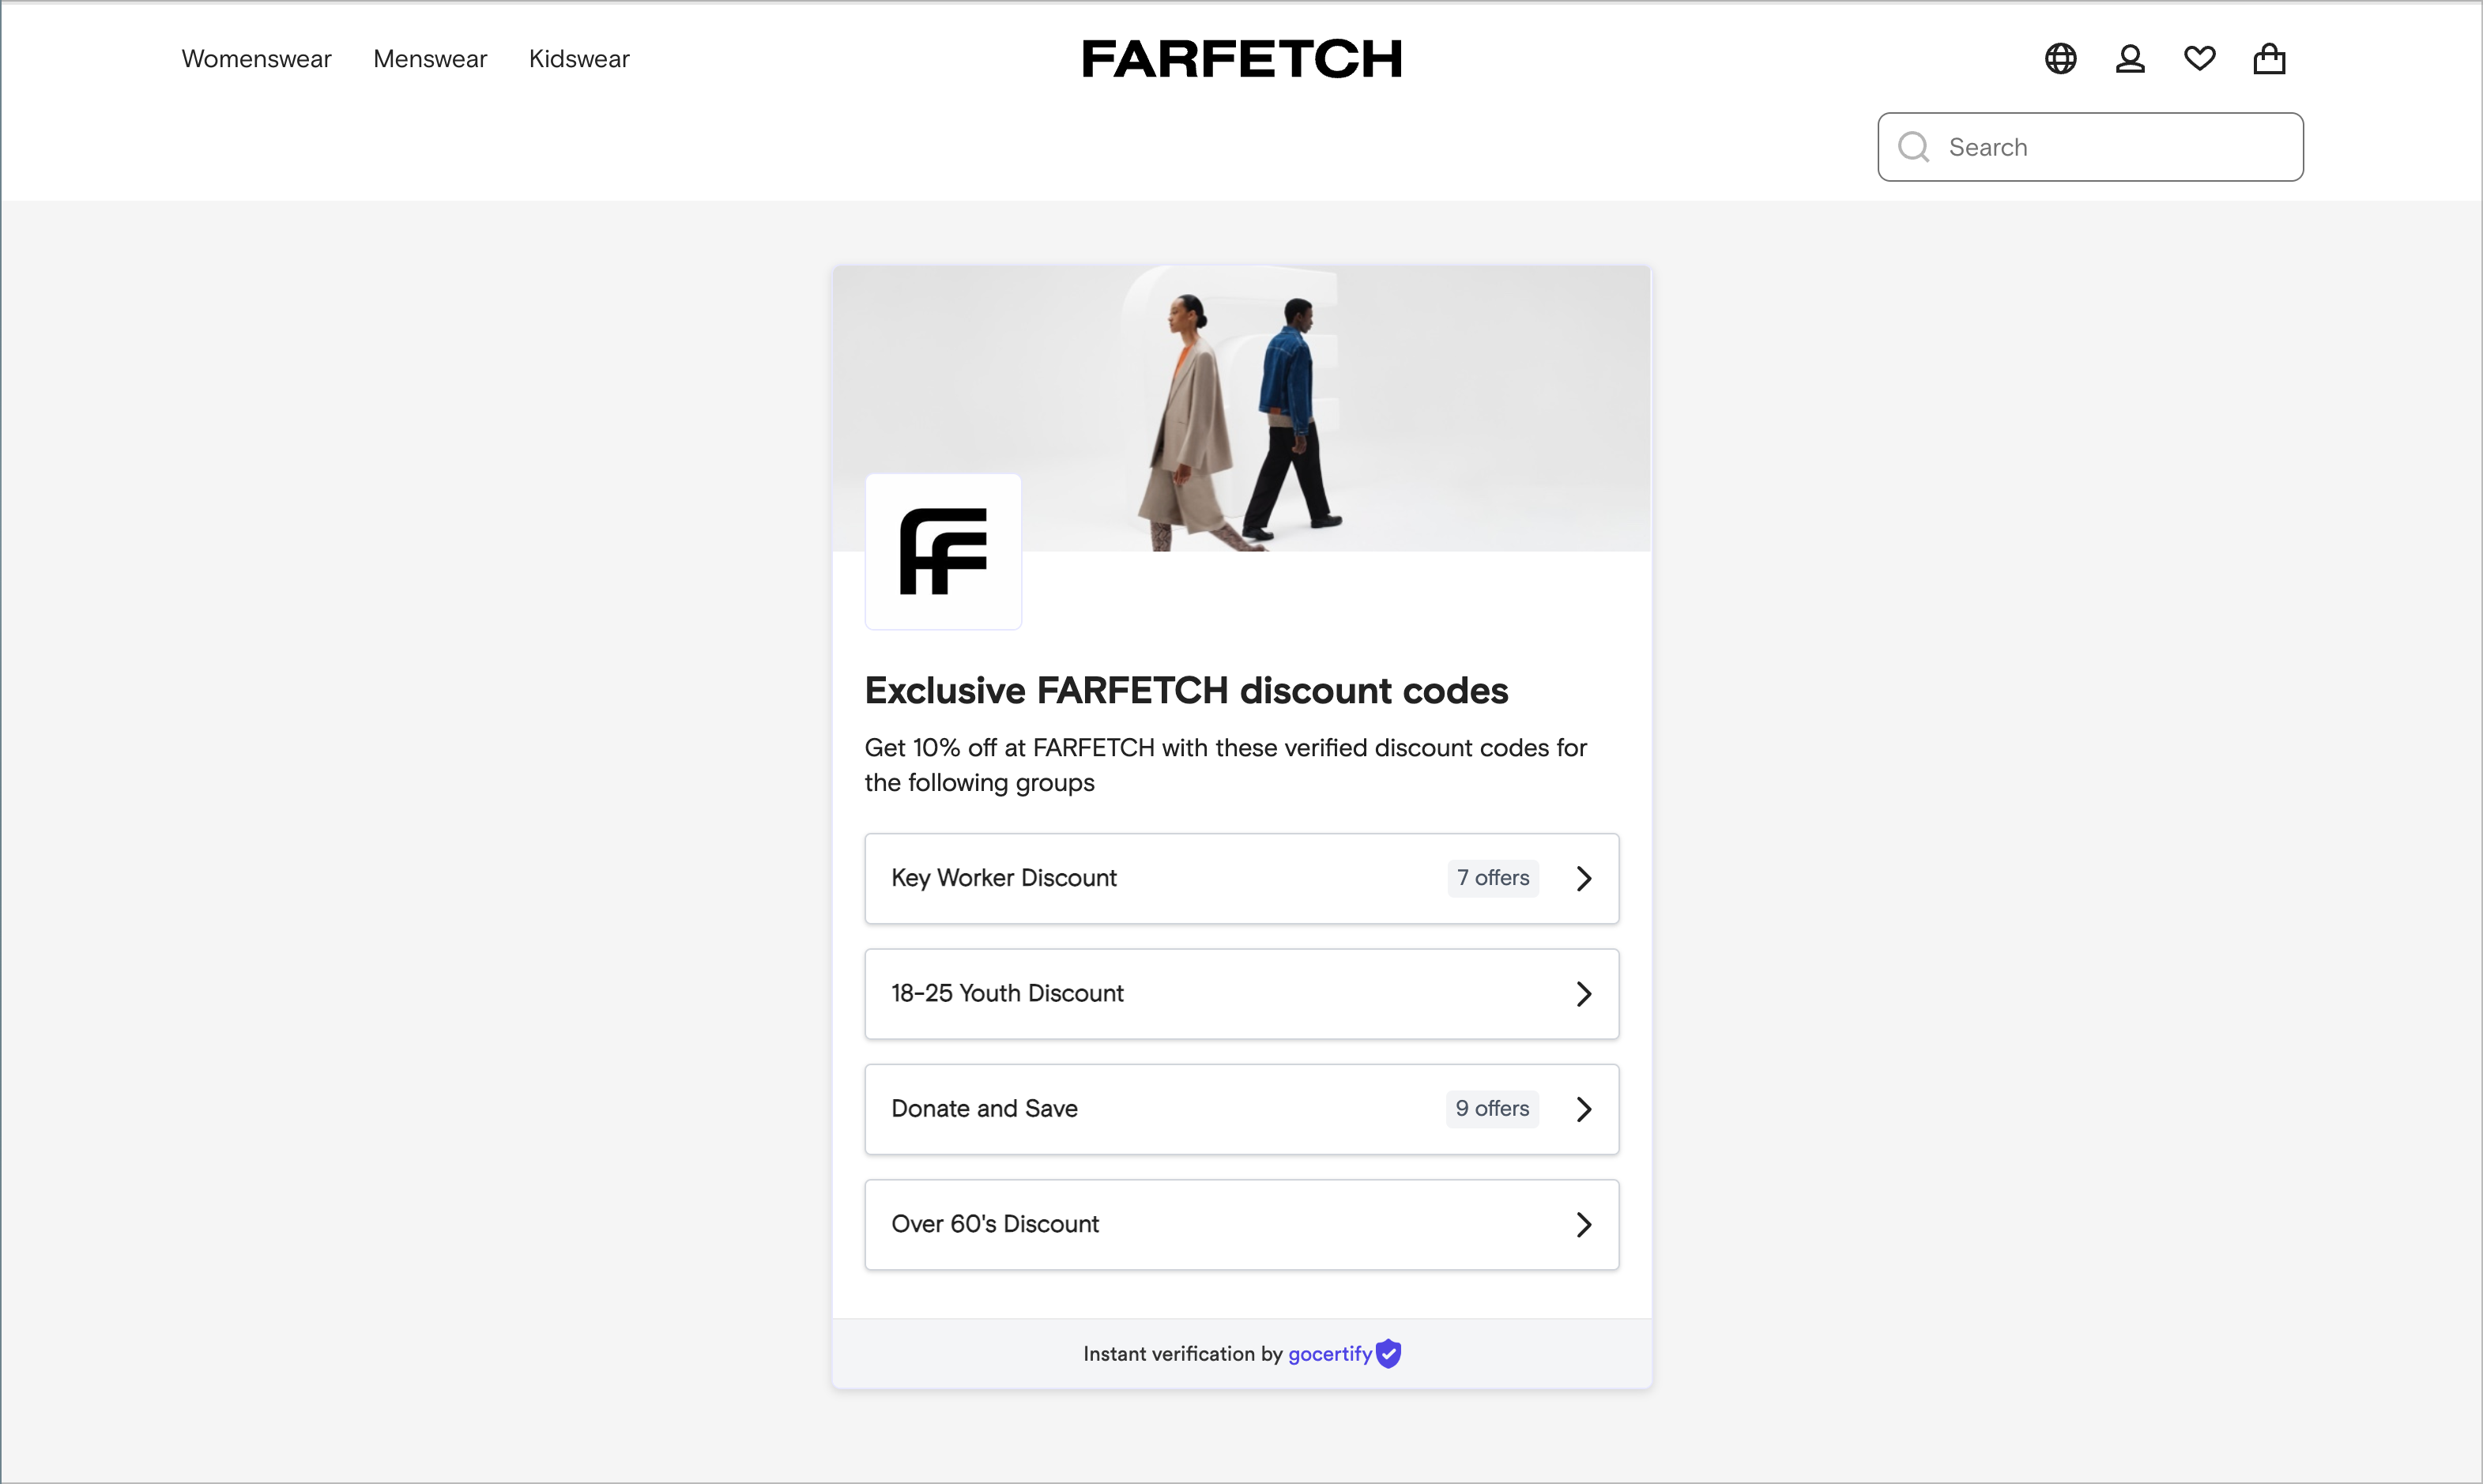 Adding a campaign specific landing page is simple, we recommend getting started with the following steps:
Create a new page on your site for each campaign type you want to promote.
Most brands reference the campaign type within the page url (i.e `company.com/student-discounts`) and add a simple title/description highlighting their offers.
Your Gocertify account manager can provide you with the relevant iFrame code for each campaign.
Once you have your basic page setup you can paste in the following iFrame within the `` tag. This determines where Gocertify reward flow will appear.
```html iFrame theme={null}
```
Remember to replace `example-campaign` with your actual campaign name (e.g. "students") or leave out the attribute `source="example-campaign"` to display all campaigns.
## Create multi-offers page
OfferHub is a centralised location for all your discounts and offers. It's a great way to showcase all your promotions in one place and drive traffic to your site.
Best practice is to create a dedicated multi-offers page to showcase all your discounts in one place. To increase SEO traffic ensure the terms “discount codes”, “offers” and “coupon” (if wanting to rank in the the USA) are mentioned:
* **Clear Page Slug:** i.e `discounts`
* **Meta title and H1:** Official *Brand* Discount Codes and Offers
* **Meta description:** Did you just search for a *brand* discount code? That's an intelligent move - you're obviously a savvy shopper. This is the official discount code page for *brand* and you won't find a better discount elsewhere.
* **Relevant Copy:** \~300 words talking about the rewards you offer and why they're important to your audience.
* **FAQs:** Answer common questions about your rewards.
Adding a campaign specific landing page is simple, we recommend getting started with the following steps:
Create a new page on your site for each campaign type you want to promote.
Most brands reference the campaign type within the page url (i.e `company.com/student-discounts`) and add a simple title/description highlighting their offers.
Your Gocertify account manager can provide you with the relevant iFrame code for each campaign.
Once you have your basic page setup you can paste in the following iFrame within the `` tag. This determines where Gocertify reward flow will appear.
```html iFrame theme={null}
```
Remember to replace `example-campaign` with your actual campaign name (e.g. "students") or leave out the attribute `source="example-campaign"` to display all campaigns.
## Create multi-offers page
OfferHub is a centralised location for all your discounts and offers. It's a great way to showcase all your promotions in one place and drive traffic to your site.
Best practice is to create a dedicated multi-offers page to showcase all your discounts in one place. To increase SEO traffic ensure the terms “discount codes”, “offers” and “coupon” (if wanting to rank in the the USA) are mentioned:
* **Clear Page Slug:** i.e `discounts`
* **Meta title and H1:** Official *Brand* Discount Codes and Offers
* **Meta description:** Did you just search for a *brand* discount code? That's an intelligent move - you're obviously a savvy shopper. This is the official discount code page for *brand* and you won't find a better discount elsewhere.
* **Relevant Copy:** \~300 words talking about the rewards you offer and why they're important to your audience.
* **FAQs:** Answer common questions about your rewards.
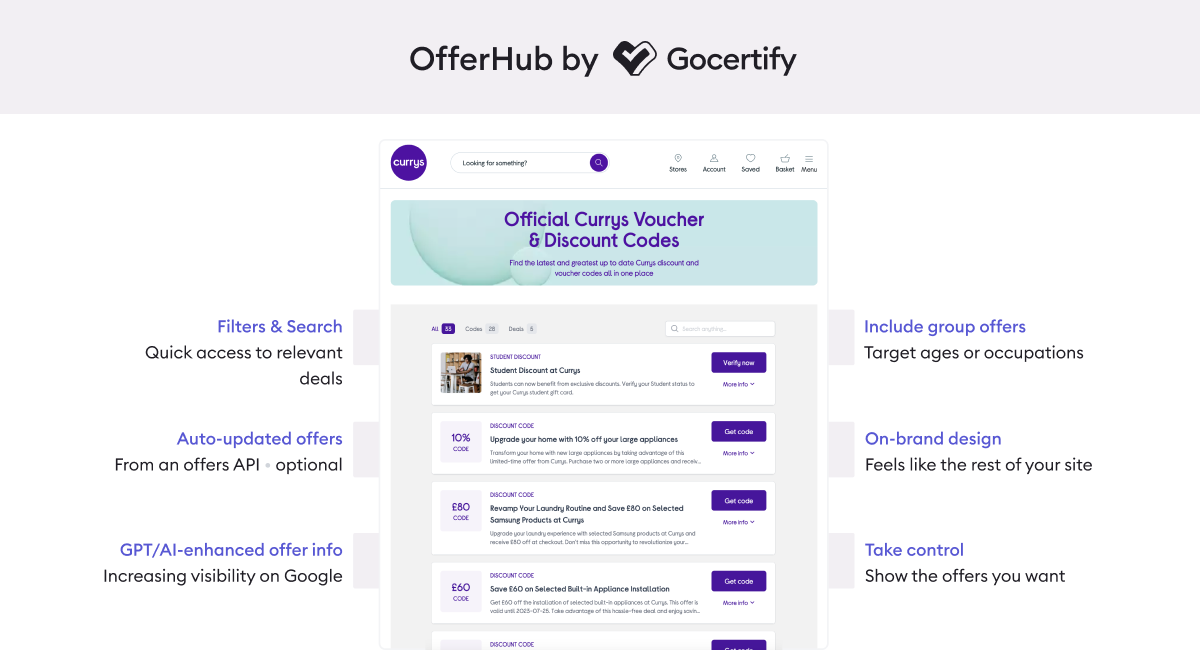 To add OfferHub to your site, follow these steps:
Create a new page on your site to host your OfferHub, most brands use `company.com/offers` or `company.com/discounts`.
Your Gocertify account manager can provide you with the relevant iFrame code for each campaign.
Once you have your basic page setup you can paste in the following iFrame within the `` tag. This determines where Gocertify OfferHub will appear.
```html iFrame theme={null}
```
To add OfferHub to your site, follow these steps:
Create a new page on your site to host your OfferHub, most brands use `company.com/offers` or `company.com/discounts`.
Your Gocertify account manager can provide you with the relevant iFrame code for each campaign.
Once you have your basic page setup you can paste in the following iFrame within the `` tag. This determines where Gocertify OfferHub will appear.
```html iFrame theme={null}
```